Inviting a Device to Connect to Your ShowShark Server
ShowShark's Remote Connect tutorial covers the standard path: connect a client on your local network first, and remote access credentials transfer automatically in the background. Simple and invisible.
But what if local is not an option? Maybe you are setting up a new Apple TV at a vacation house, or configuring an iPad for a family member who is away, or provisioning a device that will never be on the same network as your server. The device cannot connect locally (without a lot of VPN setup), so the automatic credential handshake cannot happen.
Device Invites solve this. You generate a short invite code on the server, send it to the device, and the device uses it to establish a remote connection directly; no local network required, no VPN, no port forwarding. The whole process takes about a minute.
What You Will Need
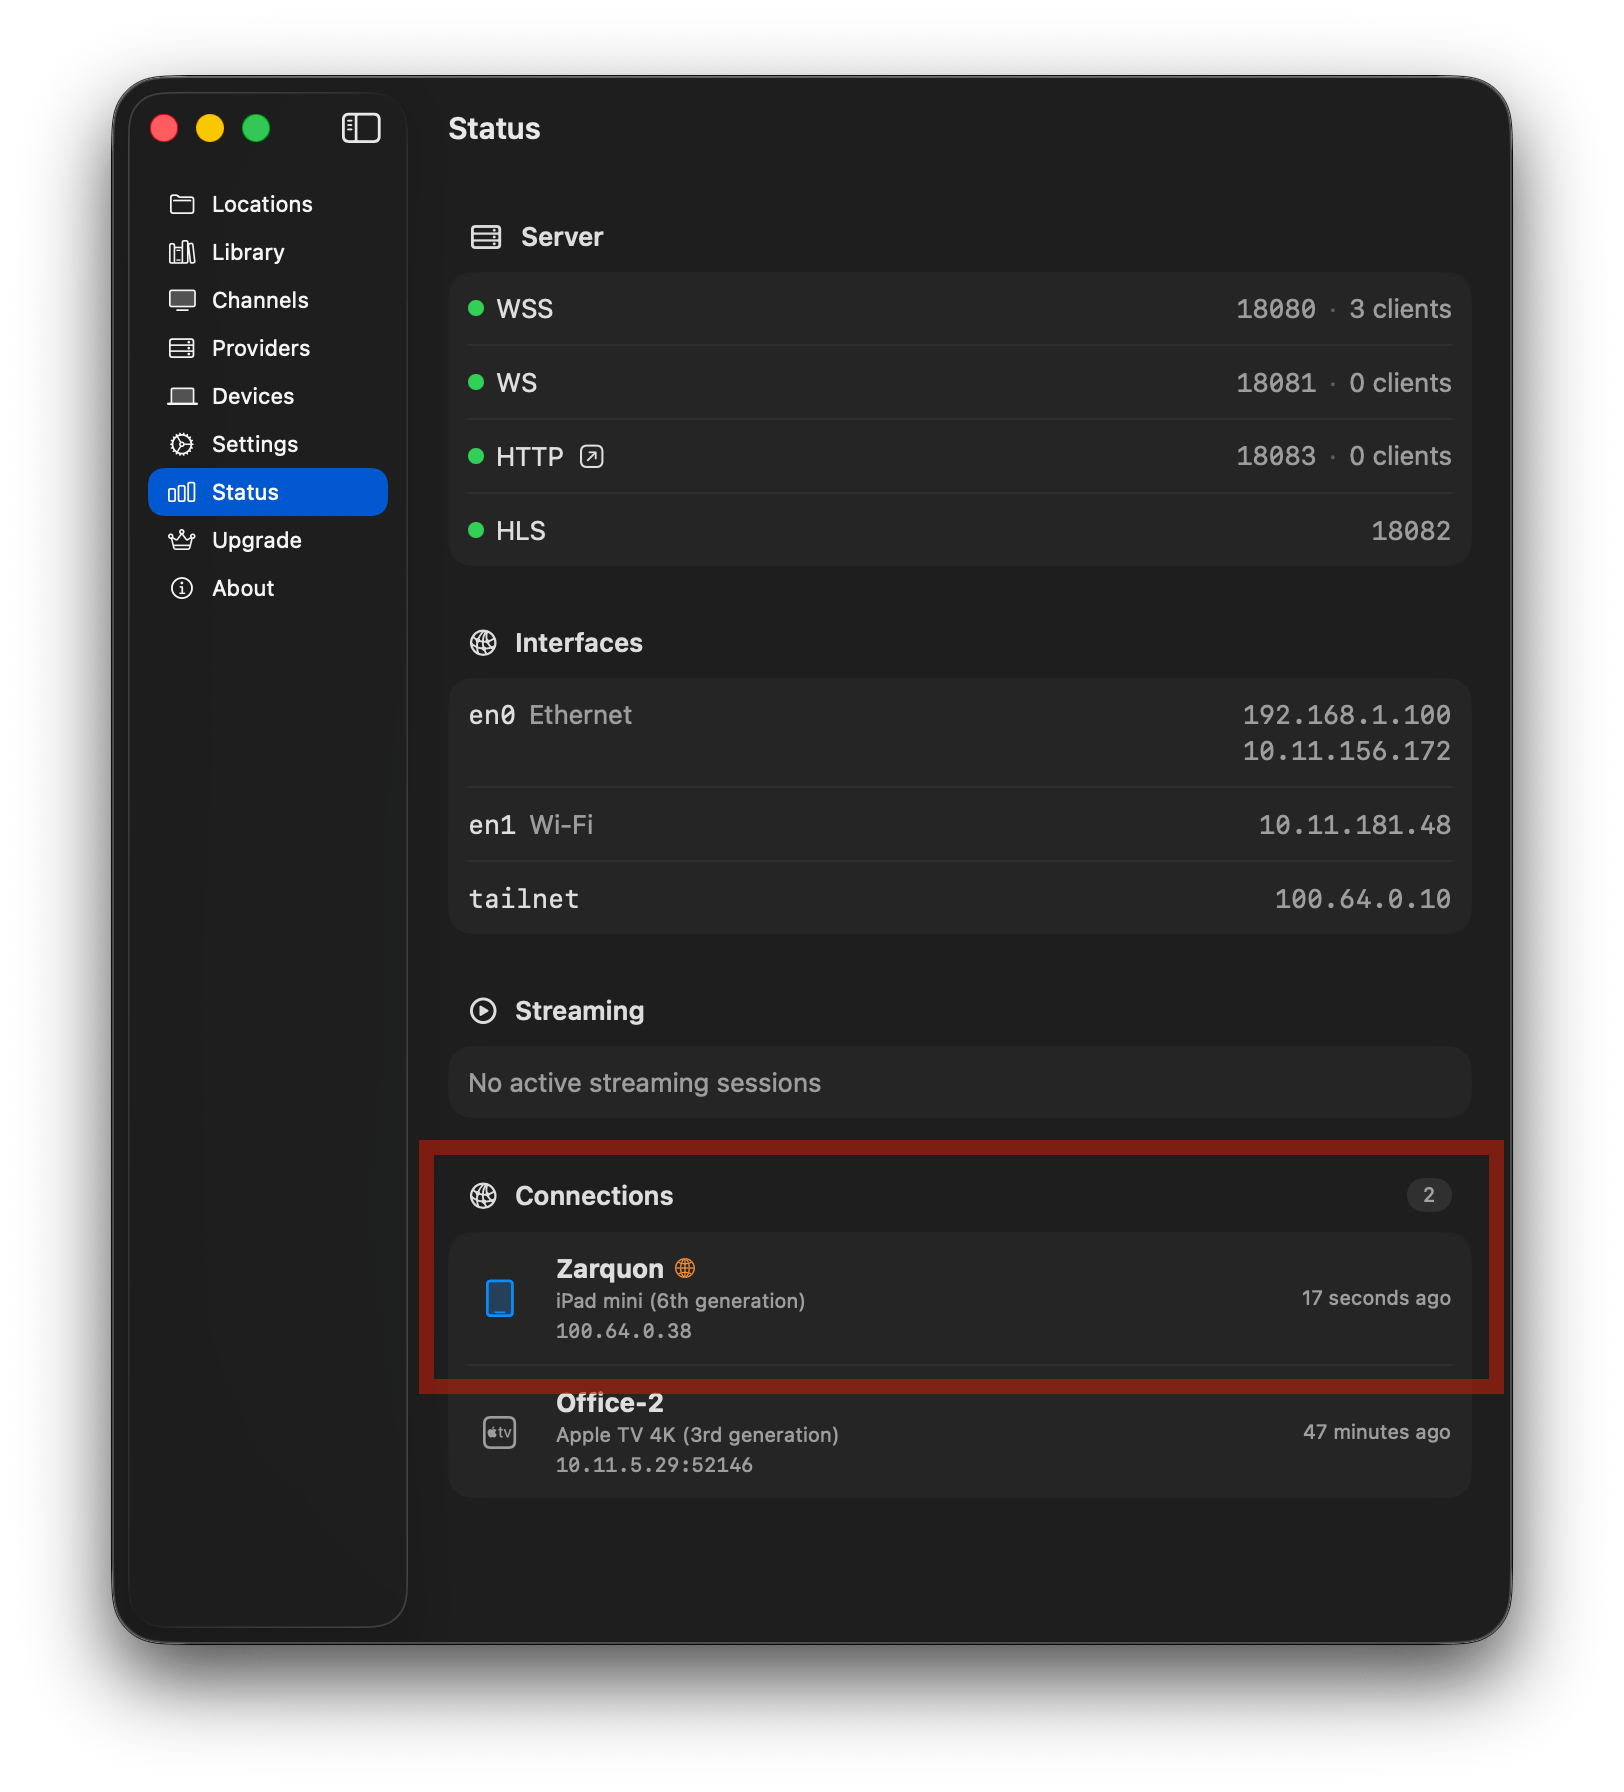
- ShowShark Server running on your Mac, signed in via the Upgrade tab (remote connectivity must be active; you should see a "tailnet" entry in the Status tab under Interfaces).
- ShowShark Client installed on the device you want to connect.
- A way to send a short code to the other device (a text message, an email, a phone call, a sticky note; anything works).
Step 1: Generate an Invite Code
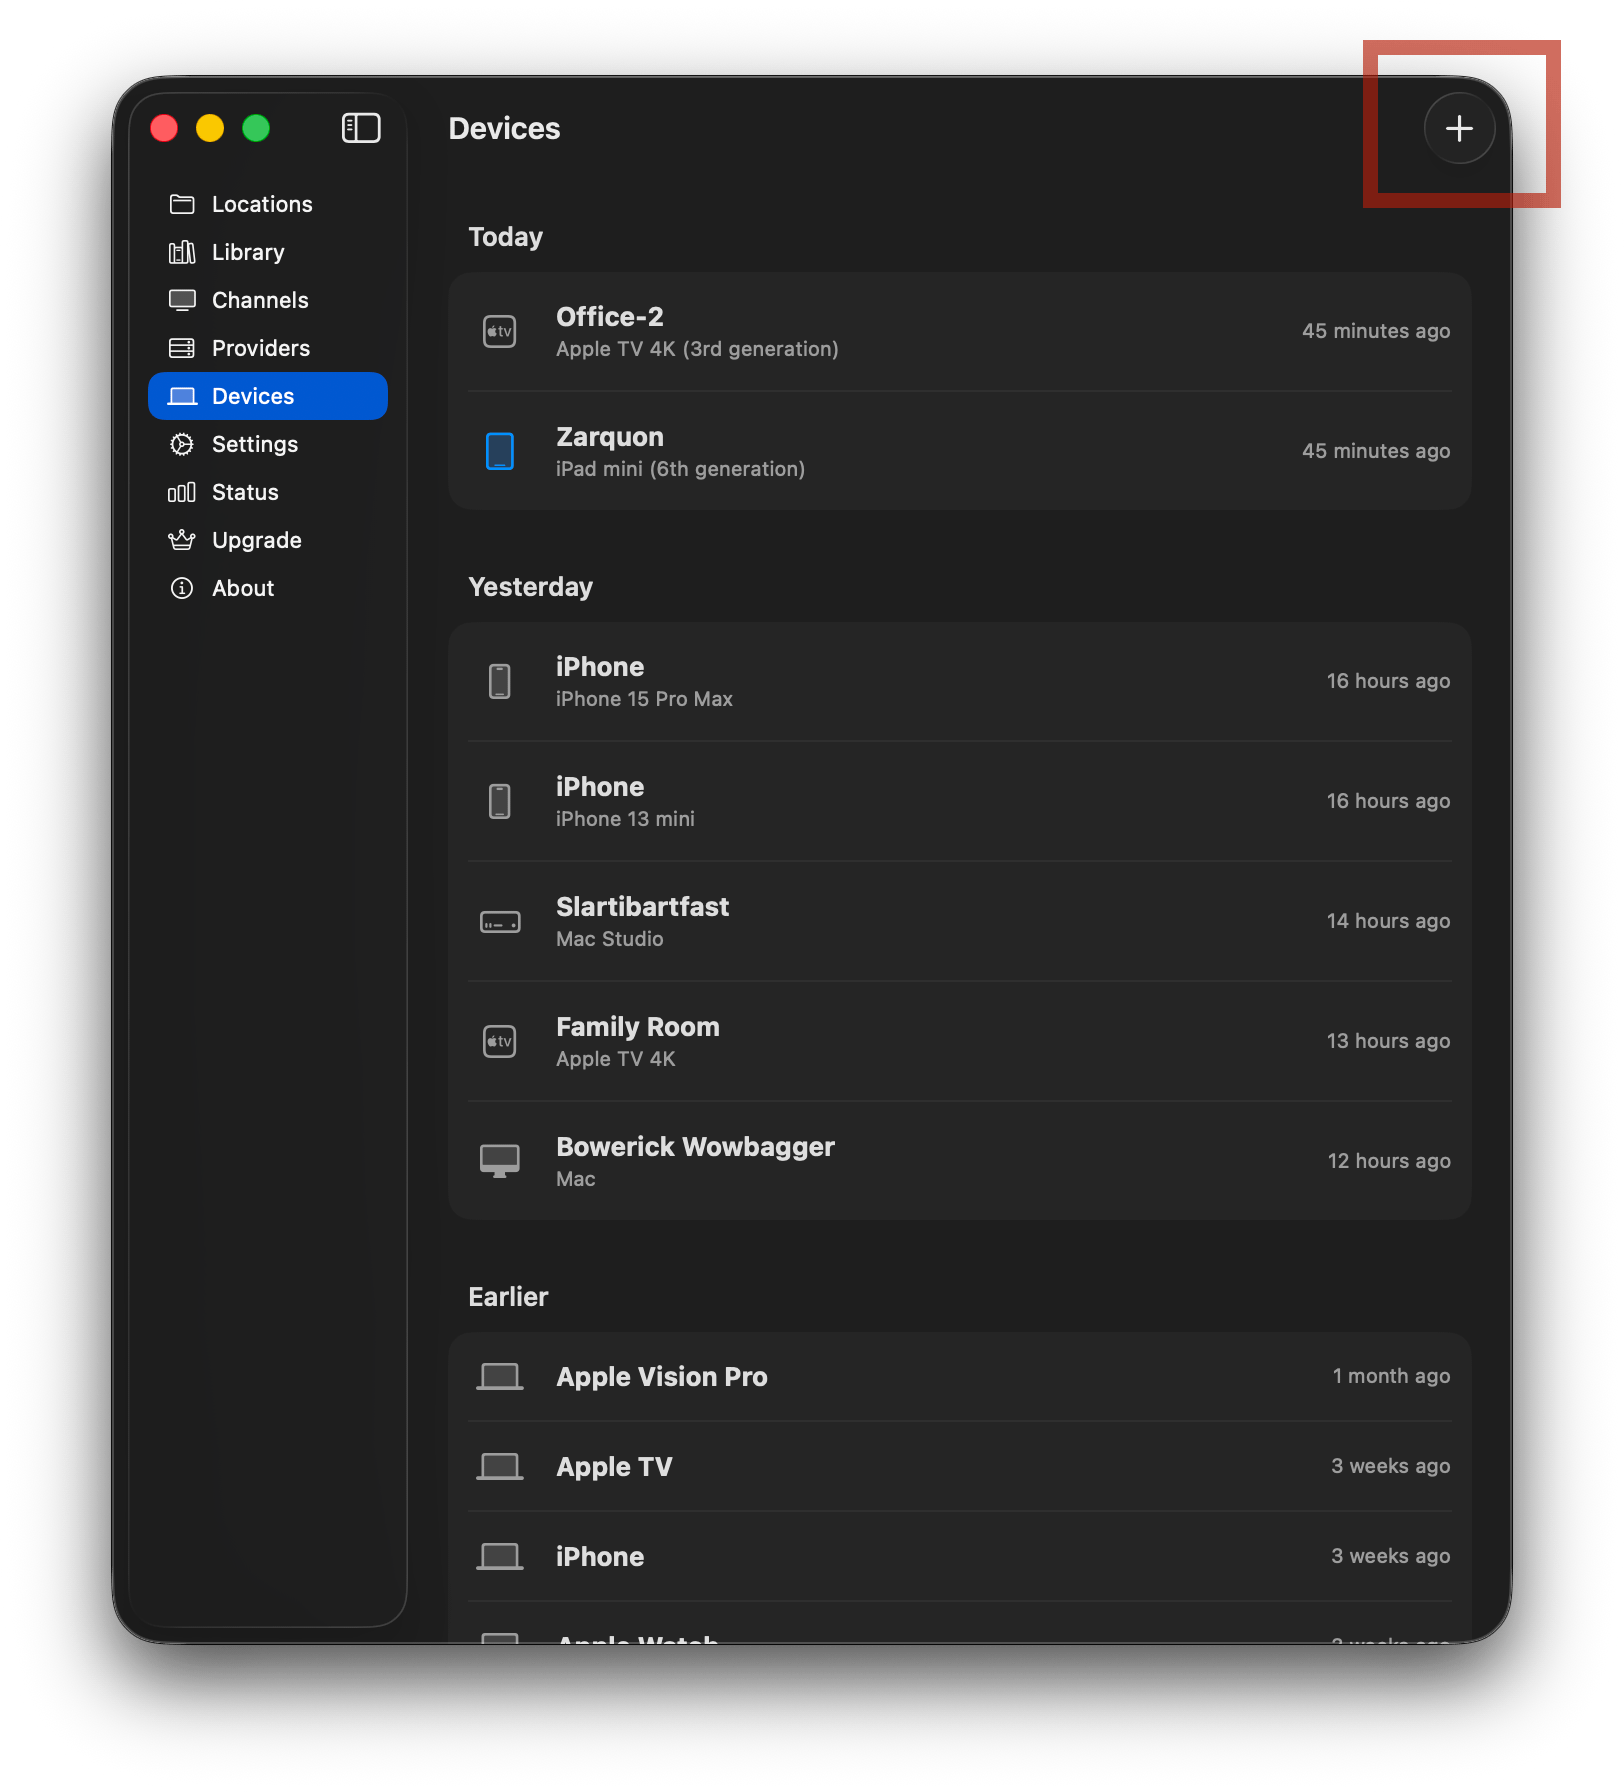
On your Mac, open ShowShark Server and navigate to the Devices tab in the sidebar.
Click the + button in the toolbar. This opens the invite generation sheet.
Click Generate Invite Code. After a moment, a 6-character alphanumeric code appears along with a shareable link.
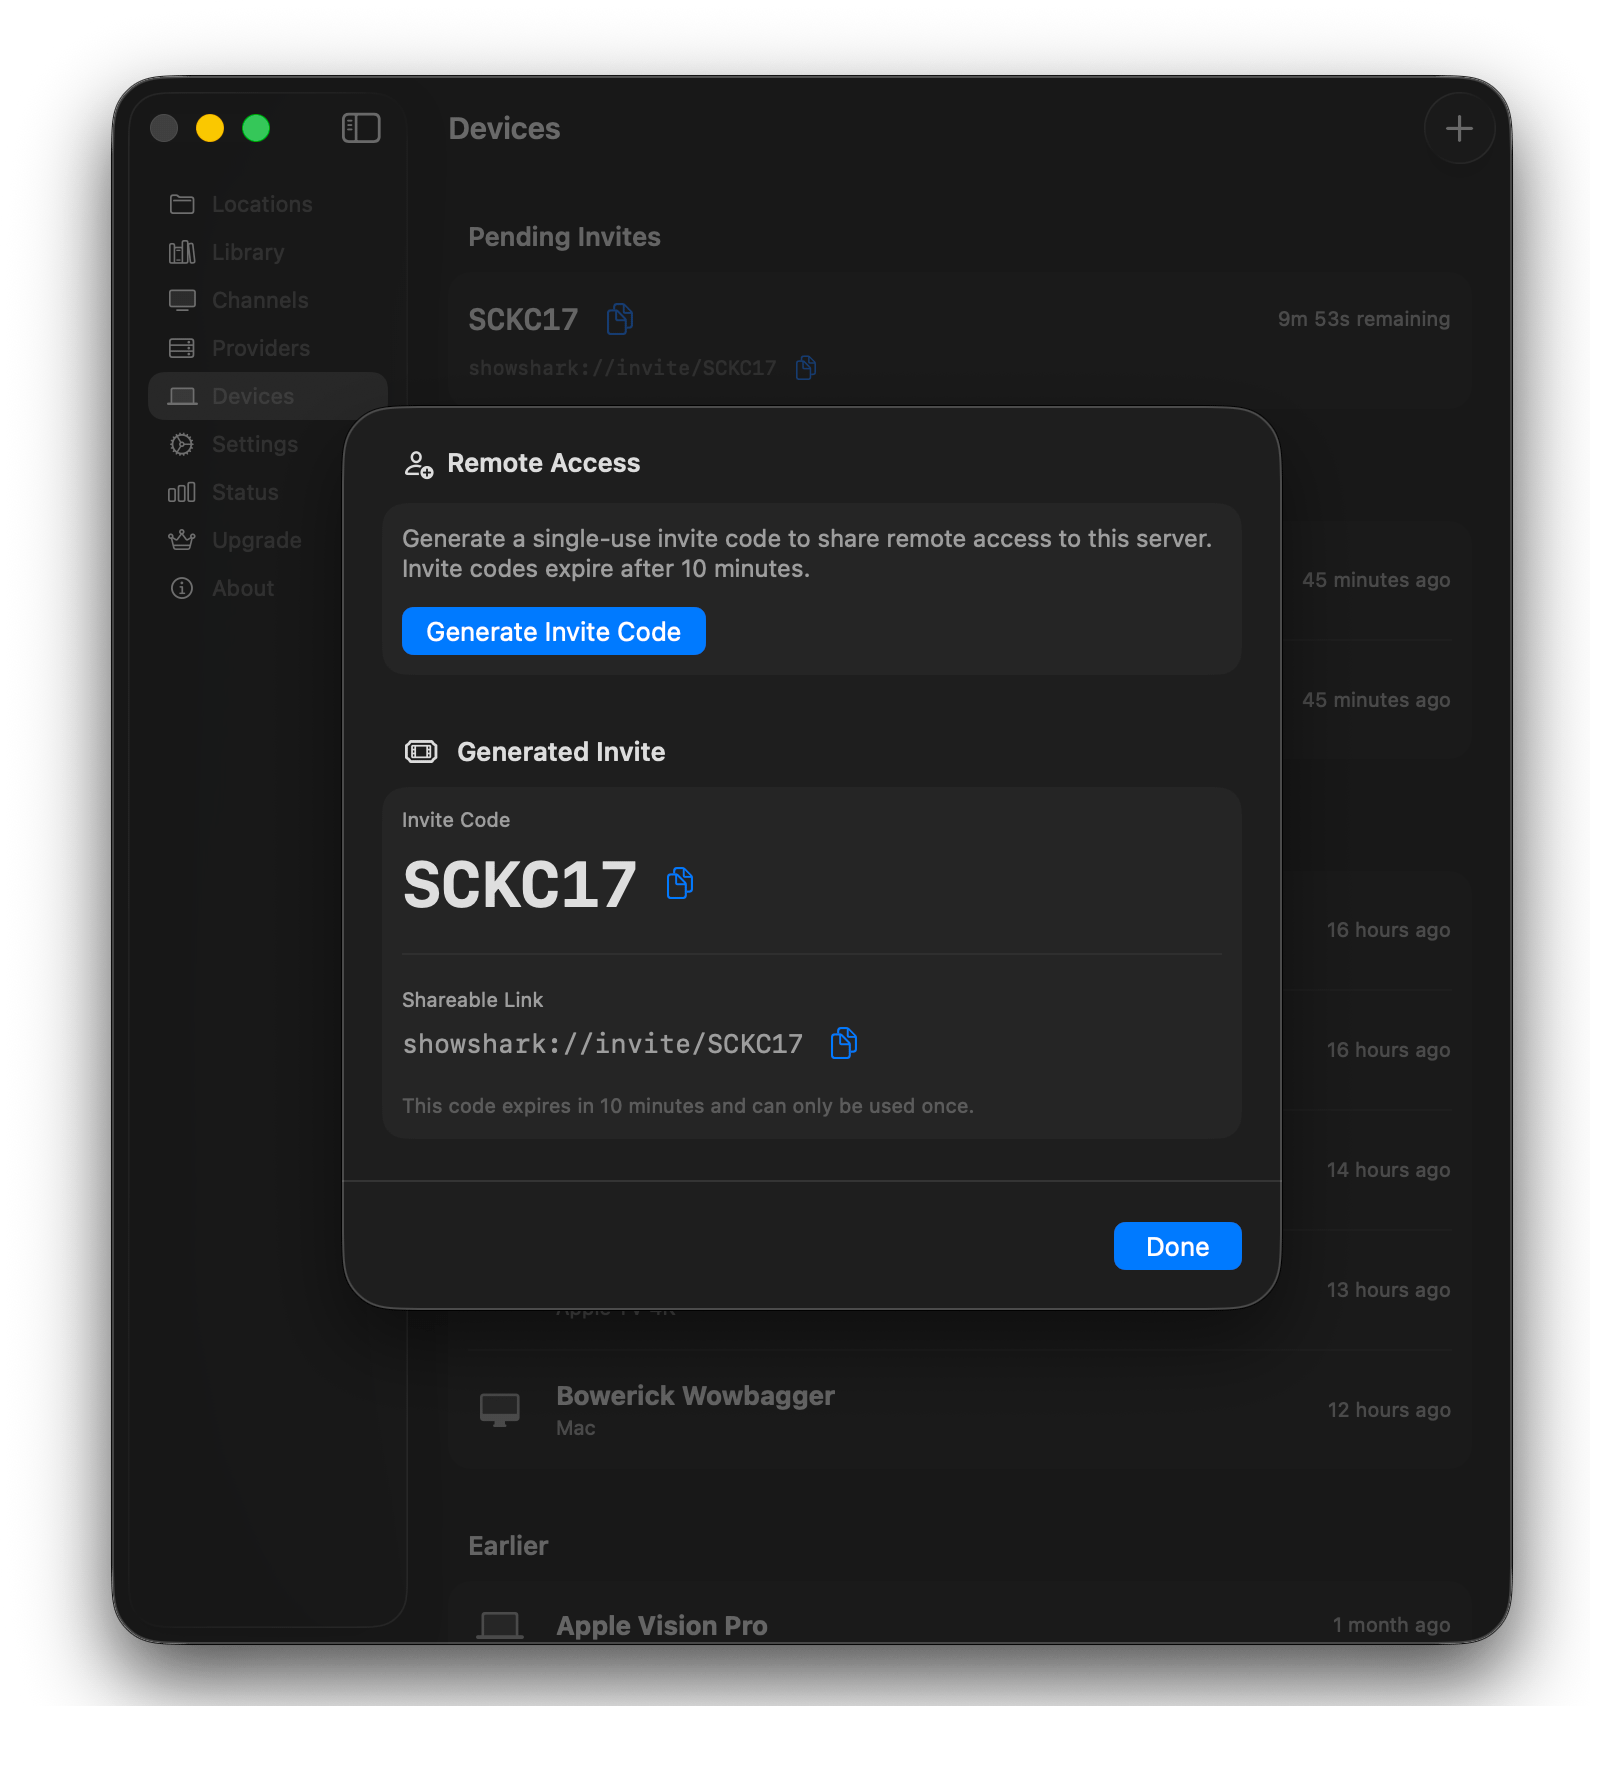
Copy the code or the link and send it to whoever has the device. The code is single-use and expires in 10 minutes, so do not generate it until the other person is ready to enter it.
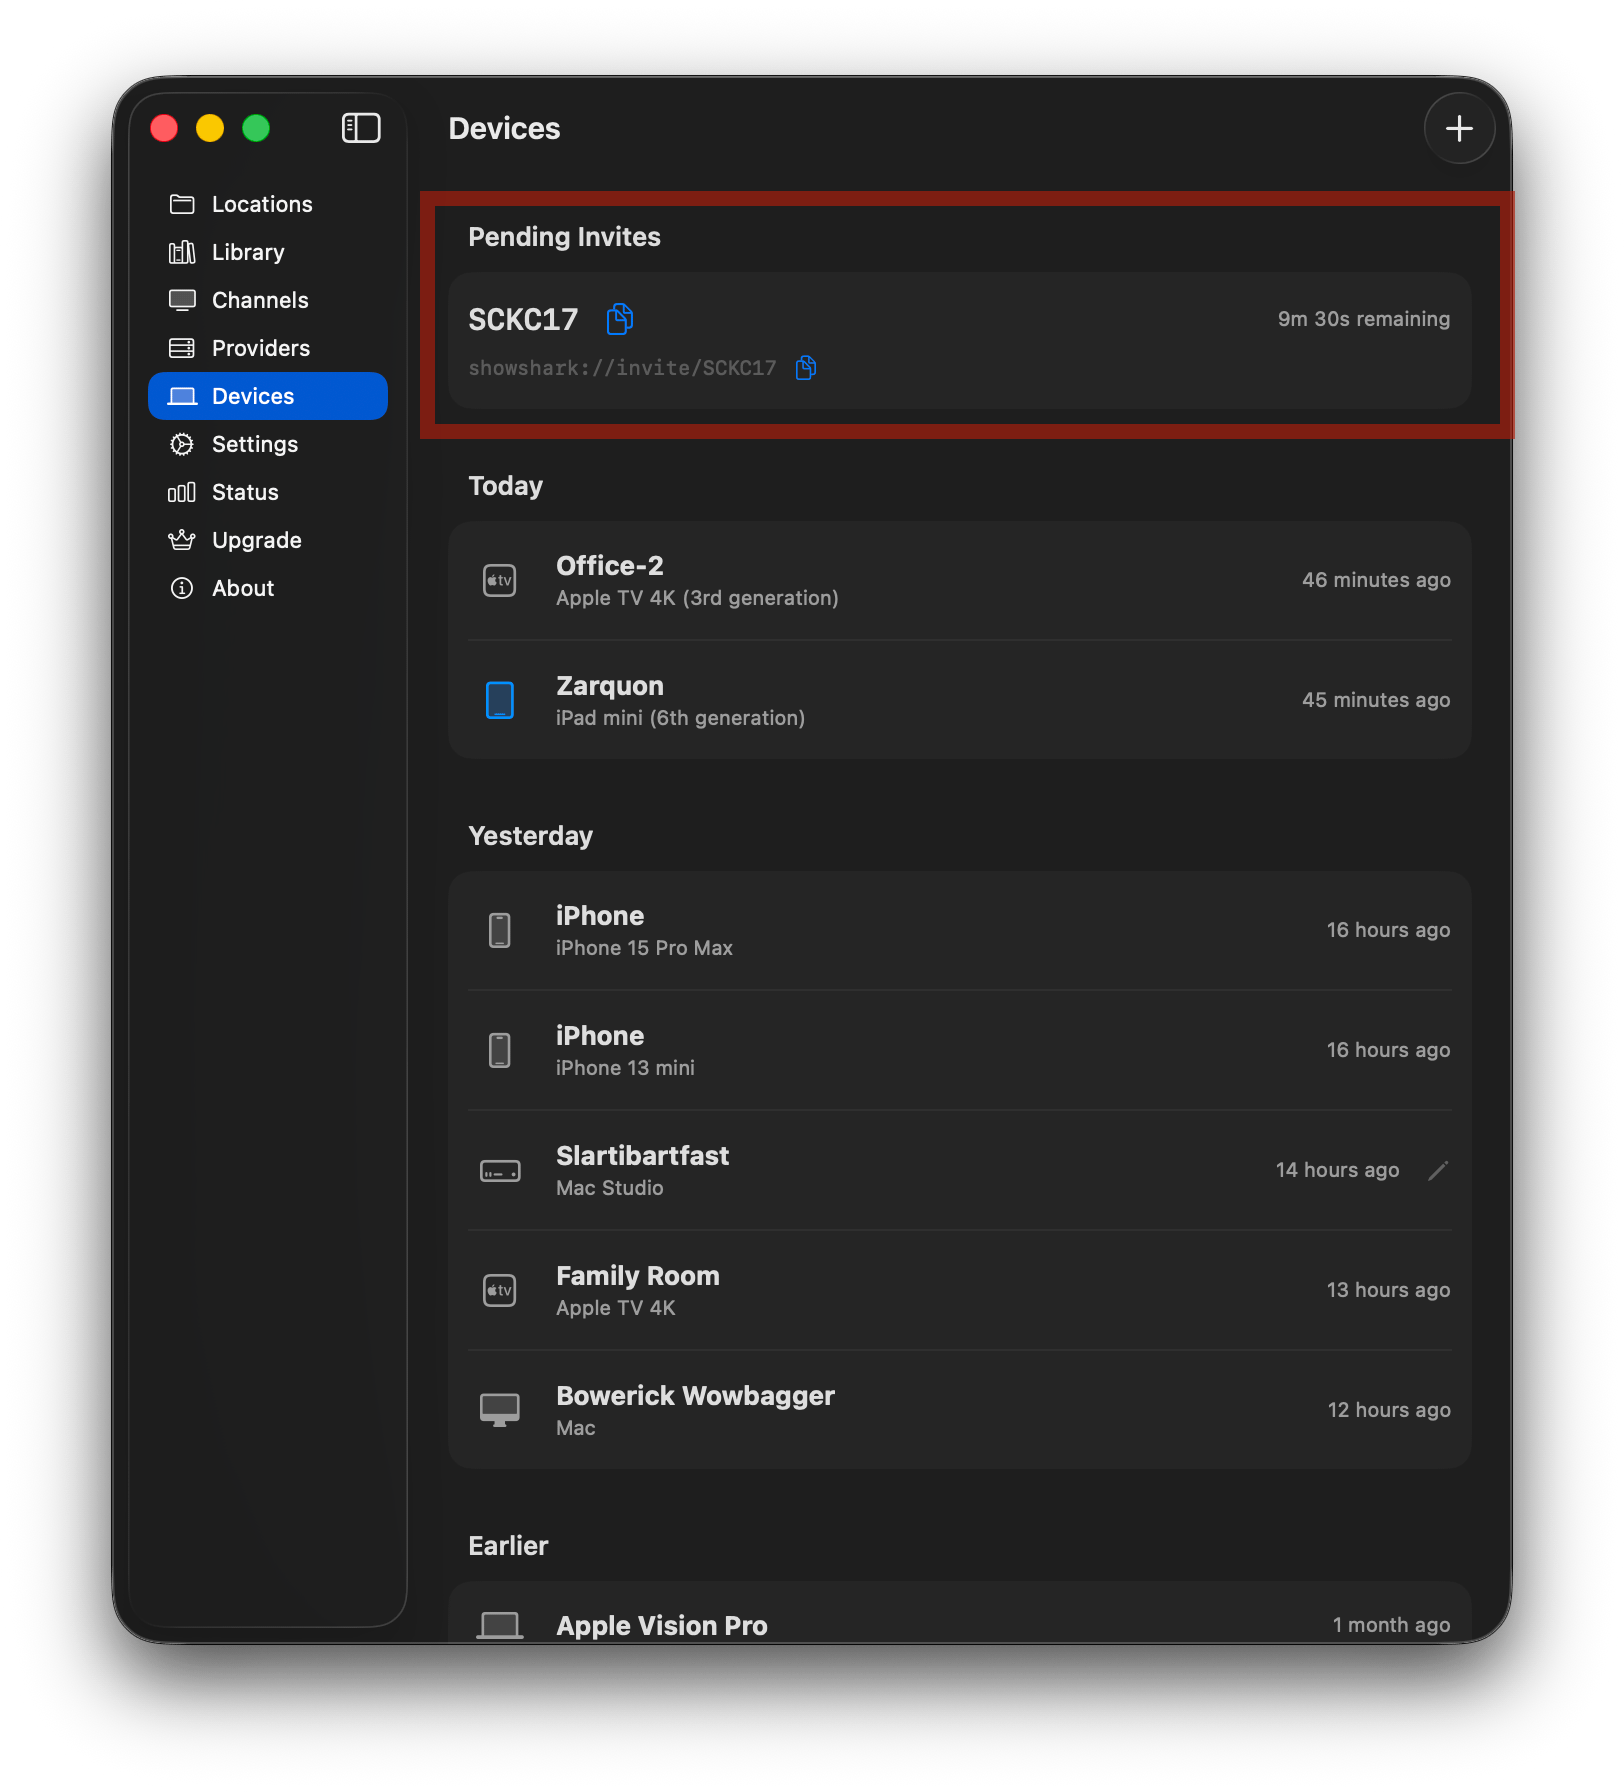
Once generated, the code also appears in a Pending Invites section at the top of the Devices tab with a countdown timer showing how much time remains.
Step 2: Enter the Code on the Client
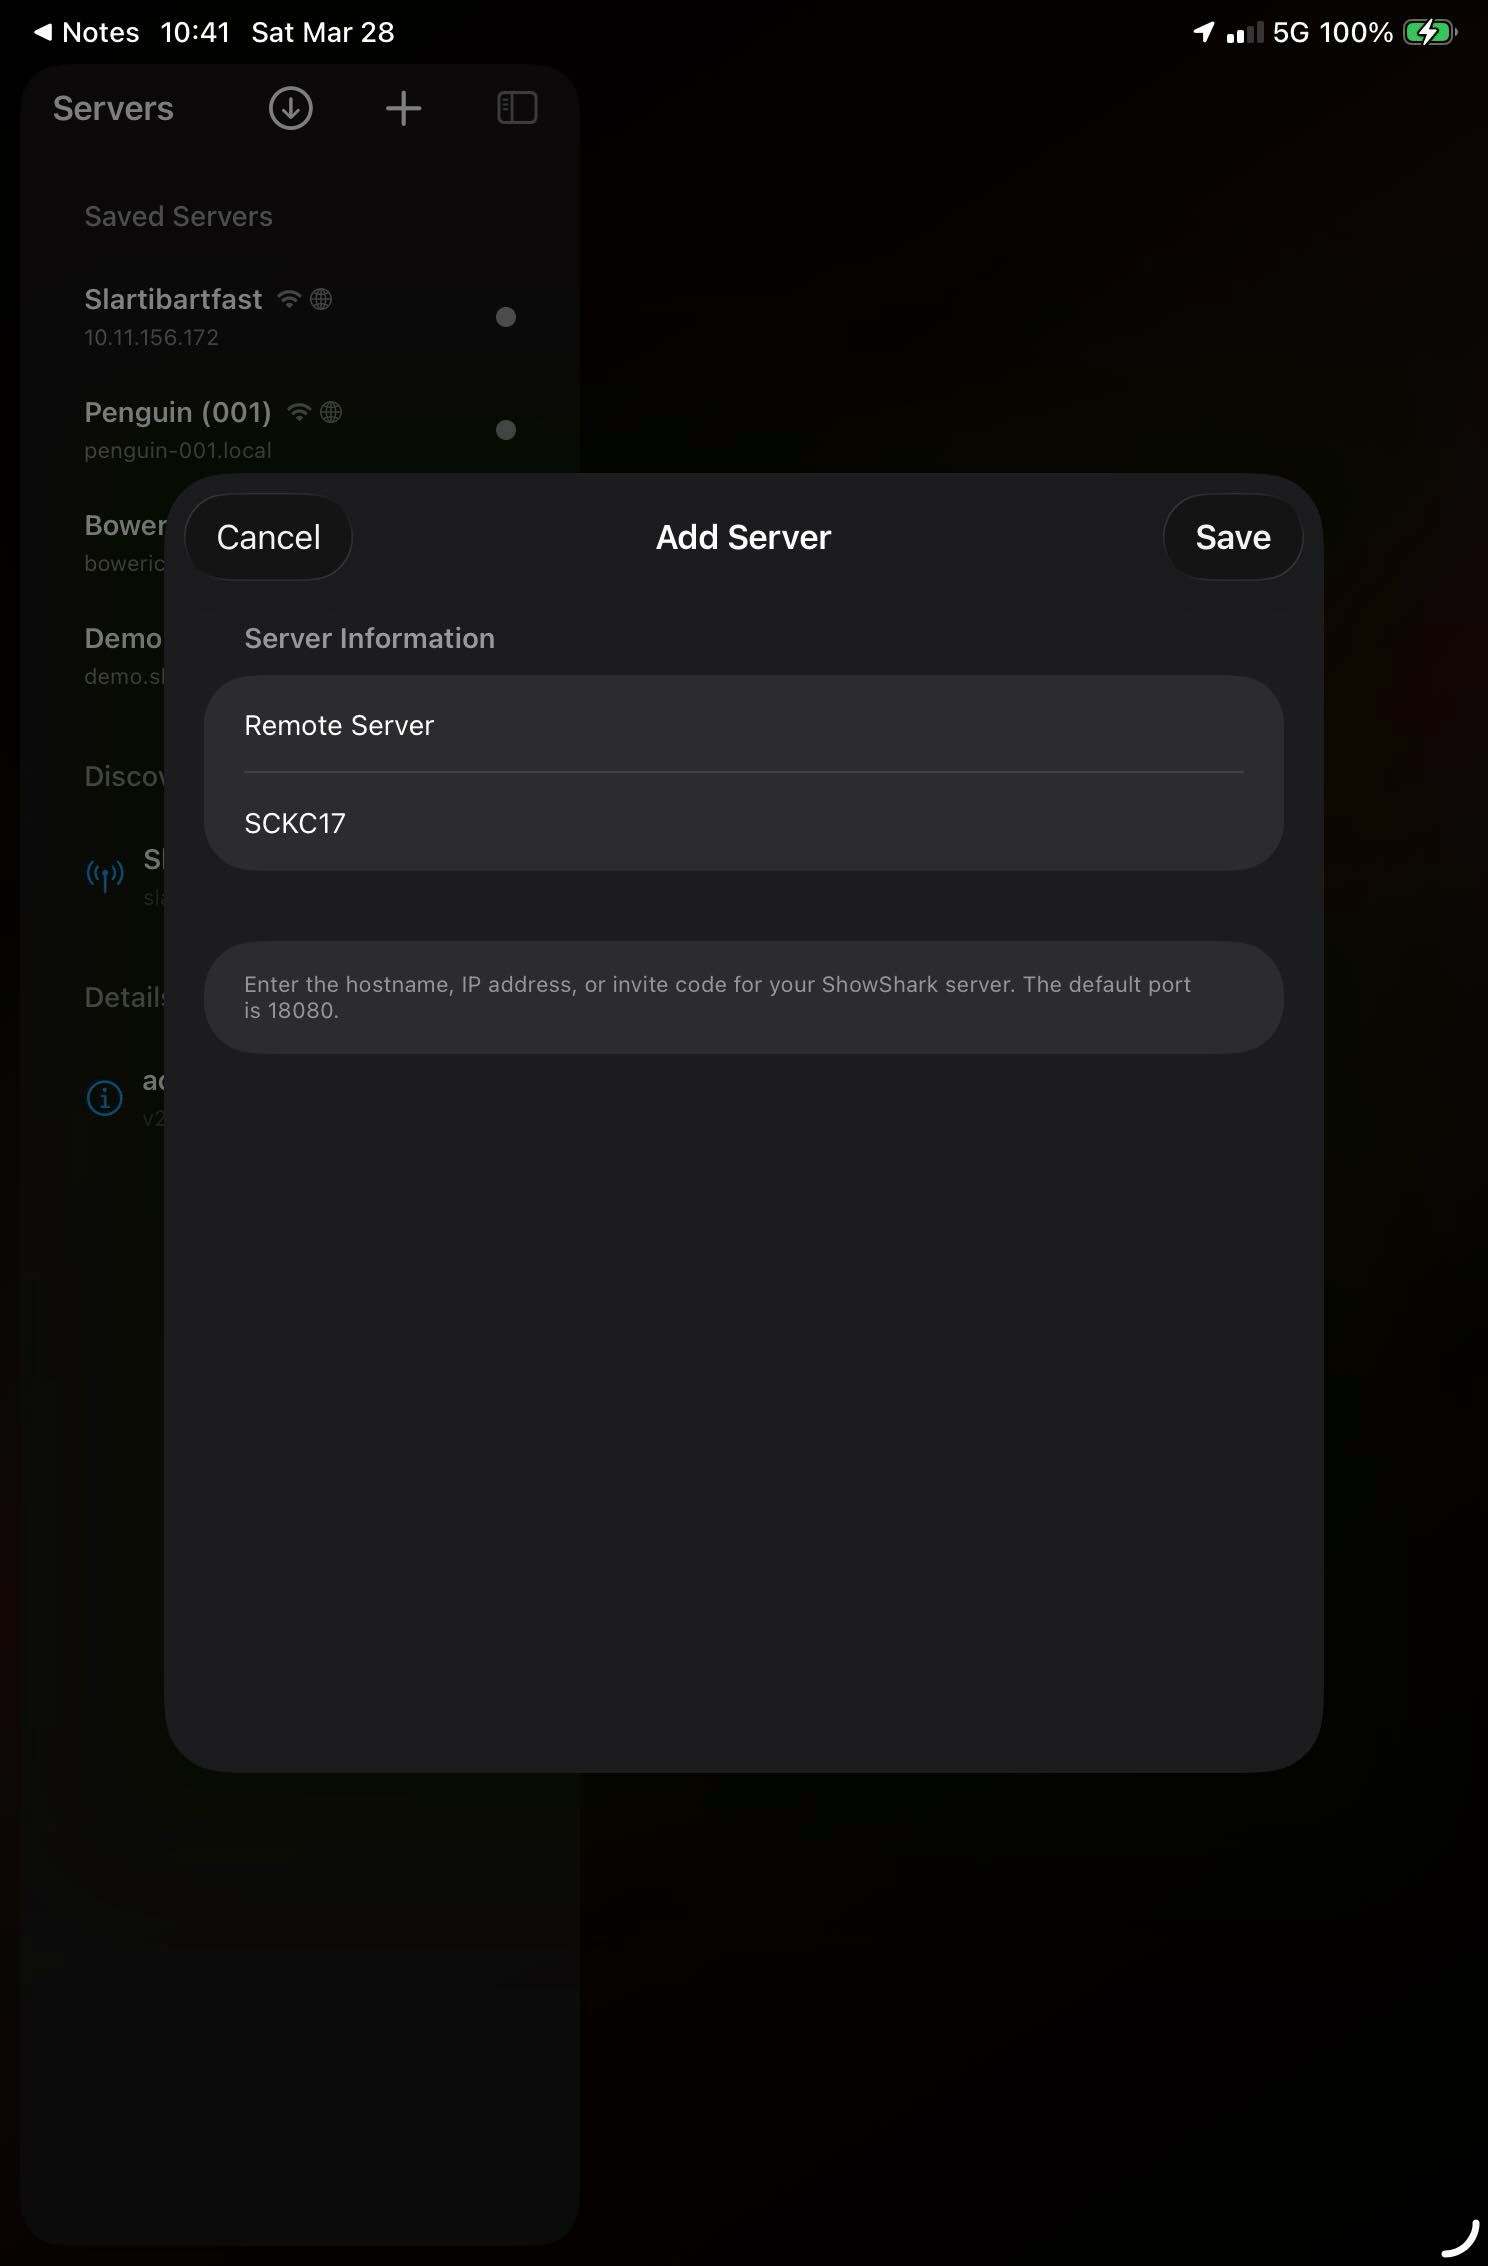
On the remote device, open ShowShark Client and tap Add Server.
In the form that appears, give the server a display name (whatever you want to call it). In the field labeled Hostname, IP Address, or Invite Code, paste or type the 6-character code. That is all you need; when ShowShark detects an invite code, the port and password fields disappear automatically since the code carries that information for you.
Tap Save.
If the other person sent you the shareable link (showshark://invite/...) instead of the raw code, just tap the link on the device. ShowShark Client opens automatically with the Add Server form pre-filled. Tap Save and you are done.
Step 3: Wait for the Connection
Tap on the new server to initiate the connection.
The first connection takes up to 30 seconds, although it is typically much faster. During this time, the client is joining the encrypted network, exchanging keys with the server, and establishing a direct tunnel.
When it completes, a green indicator will appear. You're connected!
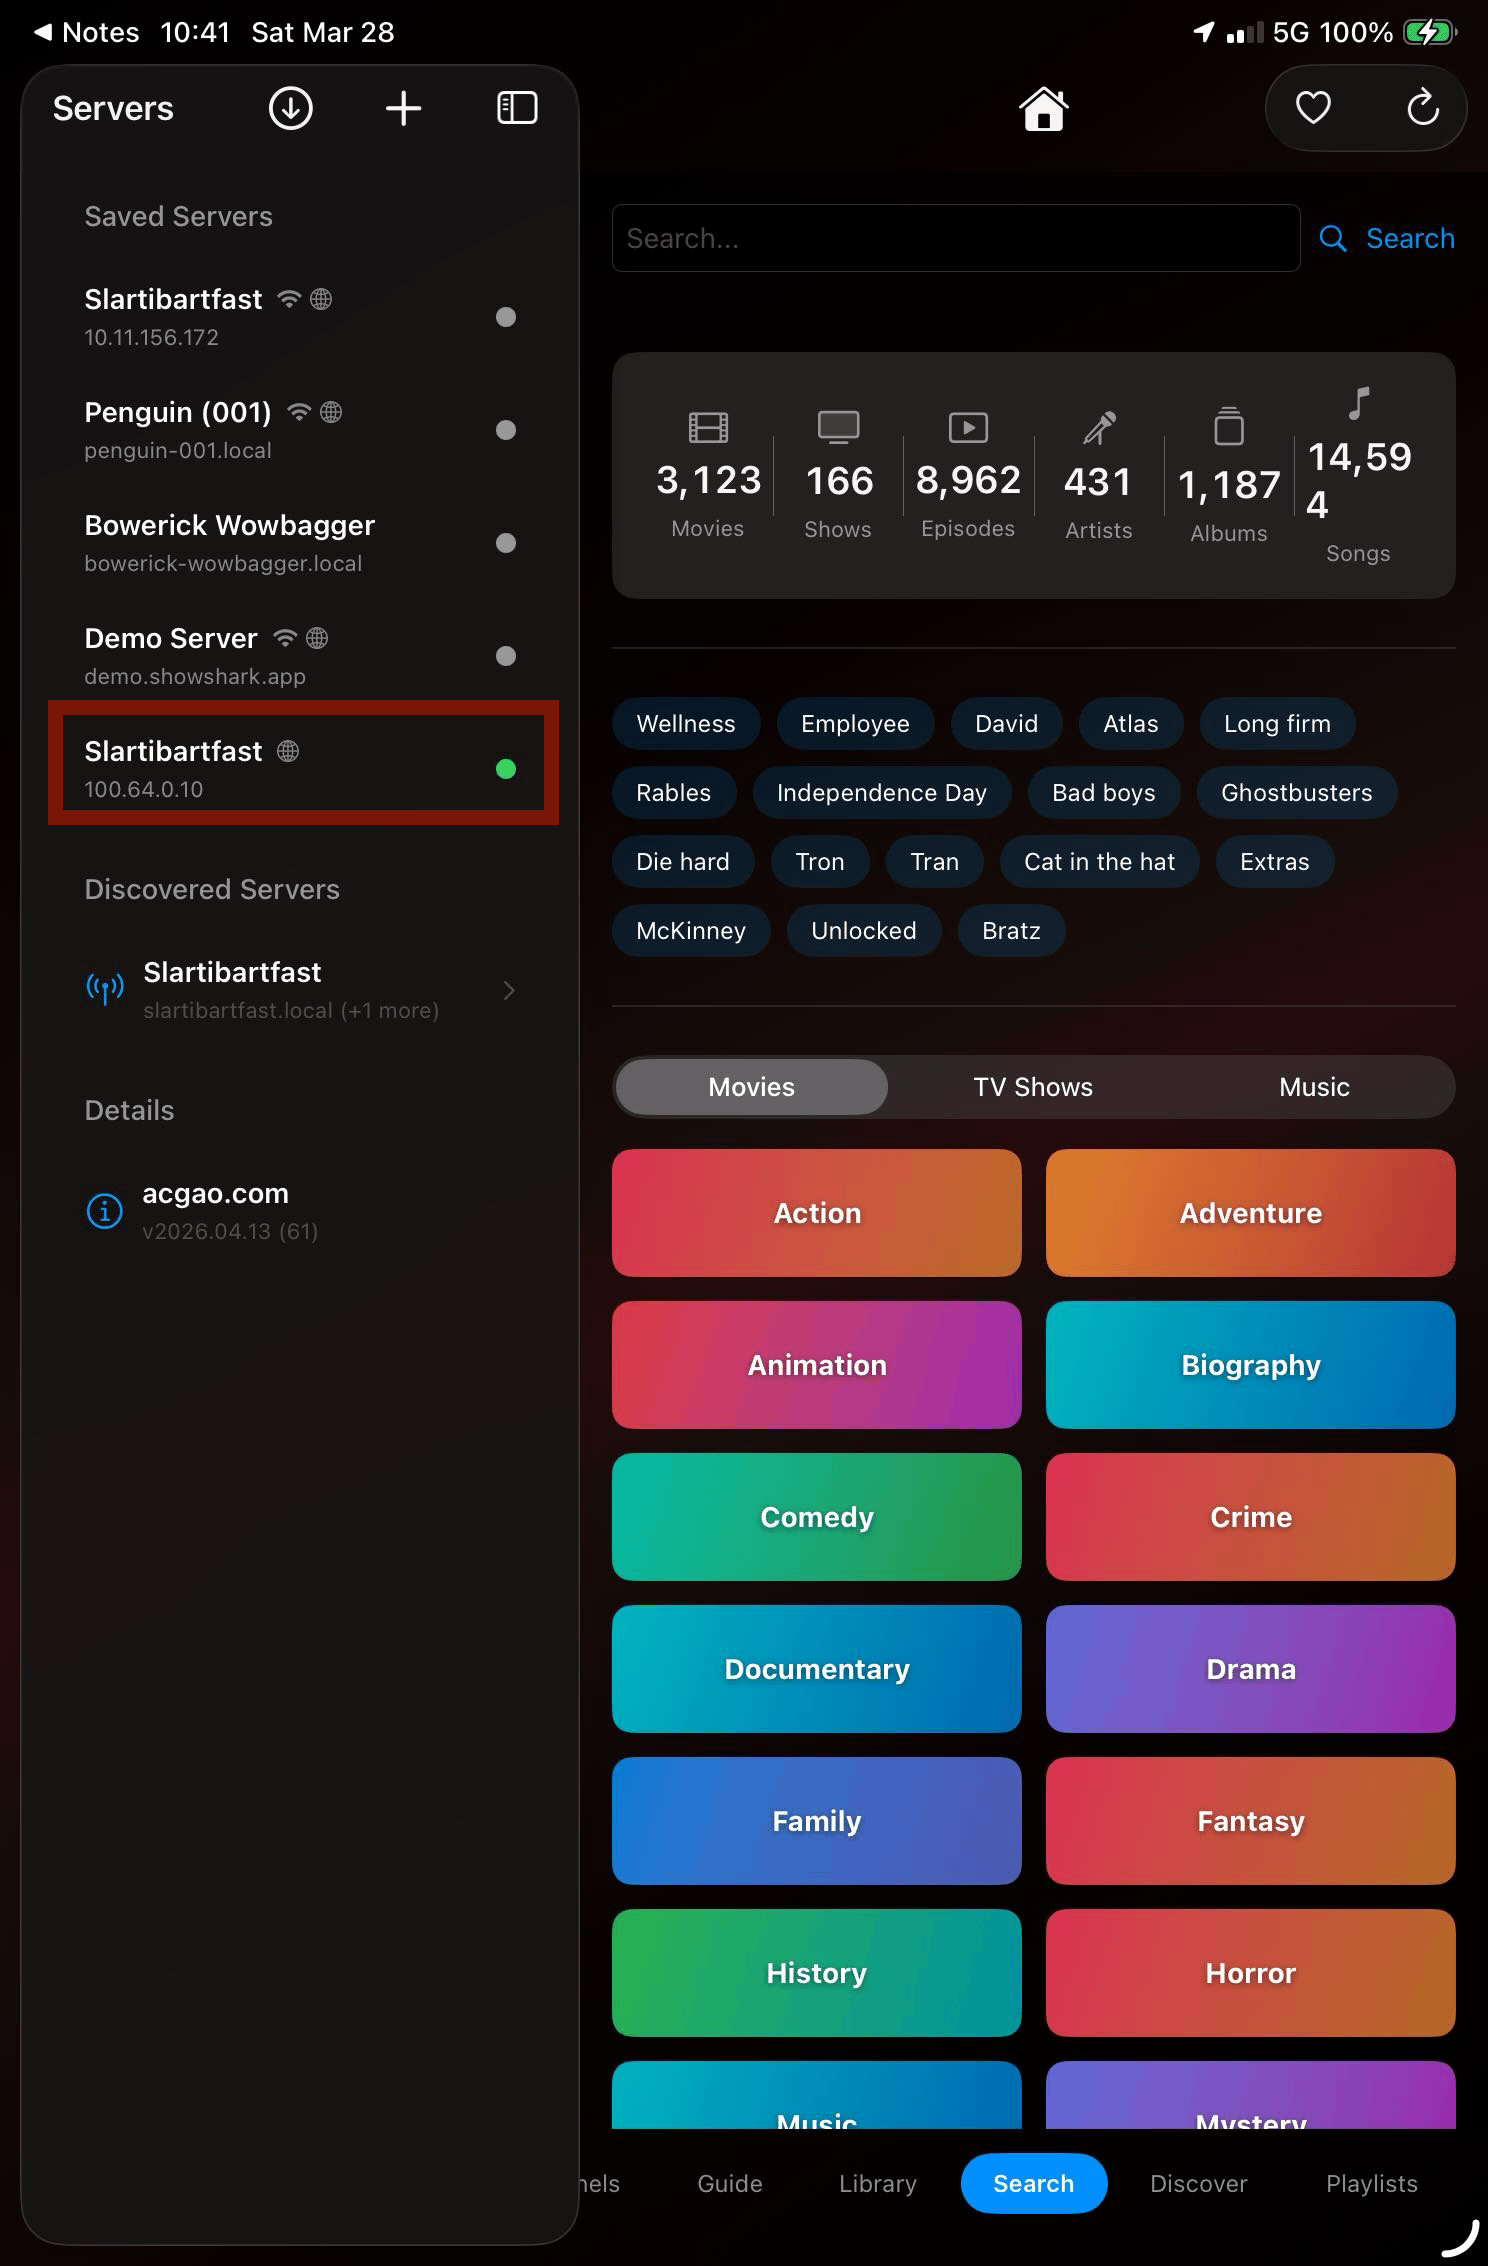
The globe icon beside the server name indicates that the server is configured for remote connections.
That is it. The device can now connect to your server from anywhere; a coffee shop, a hotel, a different country. No firewall rules, no DNS configuration, no VPN app. The connection is encrypted end-to-end using WireGuard, and the media streams directly between the client and server without passing through any relay.
What Happened Behind the Scenes
For the technically curious: the invite code is a short token that maps to a bundle of connection details stored temporarily on ShowShark's coordination service. When the client redeems the code, it receives the server's remote address, port, password, and a pre-authenticated key for the encrypted network.
The client uses that key to join the same private tailnet as the server. From that point forward, the two devices can find and reach each other through an encrypted WireGuard tunnel, regardless of what networks they are on. The coordination service brokers the initial introduction; after that, all traffic flows directly between the devices.
The invite code is single-use and expires after 10 minutes. Once redeemed, the connection credentials are saved on the client permanently. The code cannot be reused, and the window for interception is narrow. If a code expires before it is used, generate a new one from the Devices tab.
Tips
- Generate the code when the other person is ready. The 10-minute window is generous but not infinite. A quick text message saying "ready?" before generating avoids wasted codes.
- One code per device. Each invite code provisions credentials for exactly one device. If you are setting up three iPads, you will generate three codes.
- The globe icon means remote-only. A server added via invite code will always show the globe icon in the client's server list because it has no local connection details. If that device later connects on the same local network as the server, it will pick up local connection details automatically and the icon will change to the wifi + globe combo.
- You can see who is connected. On the server, the Status tab shows all connected clients. Remote connections display an orange globe icon next to the device name.
Quick Reference
| Step | Where | What to do |
|---|---|---|
| 1 | Server (Mac) | Devices tab → + → Generate Invite Code → copy the code |
| 2 | Send the code | Text, email, phone call, carrier pigeon |
| 3 | Client (device) | Add Server → paste code as hostname → Save |
| 4 | Wait | First connection takes up to 30 seconds |
| 5 | Done | Tap the server to connect from anywhere |